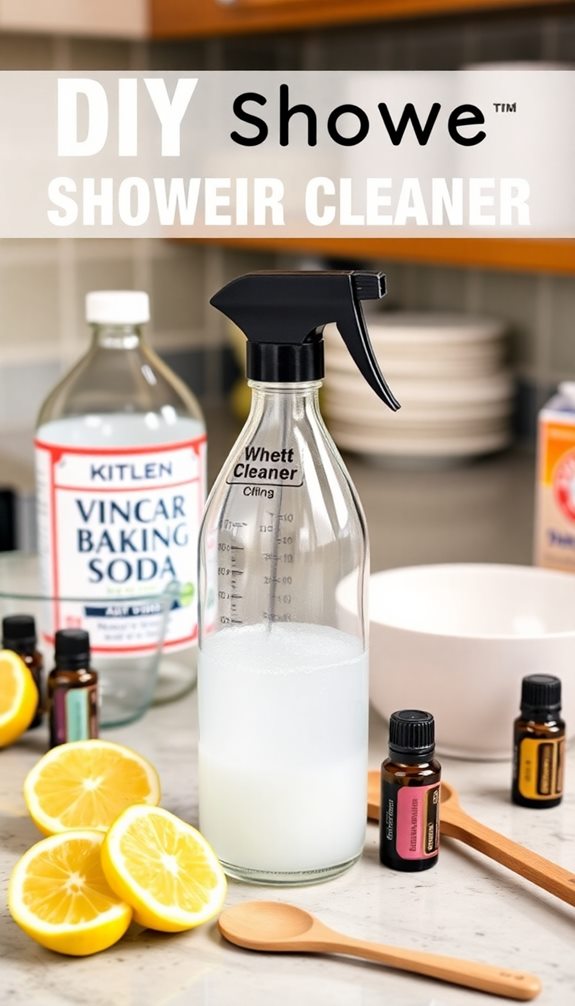
Making a homemade shower cleaner is easy and cost-effective. Start by combining equal parts of distilled white vinegar and Dawn dish soap in a spray bottle. If possible, warm the vinegar beforehand for better mixing. You can also add optional ingredients like baking soda for extra cleaning power. Once mixed, label your spray bottle for easy identification. To use, spray the cleaner generously on your shower surfaces, focusing on areas with tough buildup. Let it sit for 5 to 30 minutes and rinse thoroughly. Stick around to discover more tips and techniques for maintaining a fresh and clean shower!
Benefits of Homemade Shower Cleaners
When it comes to keeping your shower clean, homemade shower cleaners offer several impressive benefits. First off, they're a cost-effective alternative to commercial products. You probably already have key ingredients like vinegar and dish soap at home, so you won't need to break the bank.
Plus, using homemade cleaners means you're reducing your exposure to harsh chemicals, making it a safer option for you and the environment. By opting for non-toxic cleaning solutions, you can guarantee a healthier living space for your family.
Another great advantage is the effectiveness of these cleaners against soap scum and mildew. Many users find that homemade solutions outperform store-bought options, leading to cleaner surfaces with less effort. You can easily customize your recipes to suit your cleaning preferences, enhancing your satisfaction with the results.
Convenience is another perk; homemade cleaners are easy to prepare and can be stored in a spray bottle, making them accessible for regular cleaning routines. You'll find it effortless to grab your homemade cleaner and tackle those pesky stains whenever needed.
Essential Ingredients for Cleaning
To achieve the best results with your homemade shower cleaner, knowing the right ingredients is key. Start with distilled white vinegar, which is essential for breaking down soap scum and mineral deposits thanks to its acidic properties.
Regular use of vinegar can also help maintain a fresh shower experience by acting as a natural deodorizer, making it a great addition to your cleaning arsenal. Next, include Dawn dish soap, renowned for its grease-cutting abilities. This not only helps in breaking down grime but also thickens your mixture, allowing it to cling better to surfaces.
For more effective cleaning, contemplate incorporating natural remedies like lemon juice or essential oils. For easy application, use a spray bottle; it's perfect for storing your cleaning solution and makes the entire process mess-free.
Here's a quick list of essential ingredients to contemplate:
- Distilled White Vinegar: Dissolves soap scum and mineral deposits.
- Dawn Dish Soap: Cuts grease and thickens the mixture.
- Spray Bottle: Enables easy application and storage.
- Optional Additions: Hydrogen peroxide or rubbing alcohol for a no-rinse cleaner.
Don't forget to label your spray bottle clearly to prevent any mix-ups with other household cleaners.
With these ingredients in hand, you're ready to create an effective homemade shower cleaner!
Step-by-Step Preparation Guide

To create your homemade shower cleaner, you'll need just a couple of essential ingredients: distilled white vinegar and Dawn dish soap.
Mixing them is straightforward; just combine equal parts in a spray bottle, and consider warming the vinegar for better blending.
For an added boost, you might also consider incorporating natural cleaning agents like baking soda or essential oils to enhance the effectiveness of your solution.
Once you've got your mixture ready, you'll have an effective solution for tackling grime in no time.
Essential Ingredients Needed
Creating your own homemade shower cleaner requires just a few essential ingredients. With these simple items, you'll be on your way to a sparkling clean shower in no time. Here's what you'll need:
- Distilled white vinegar: This is the main ingredient that helps dissolve soap scum and grime.
- Dawn dish soap: Known for its grease-cutting ability, it enhances the cleaning power of vinegar.
- Spray bottle: You'll need this for easy application and storage of your cleaner.
- Funnel: A handy tool to pour your ingredients into the spray bottle without making a mess.
For the best results, use equal parts of vinegar and Dawn. If you want to boost the effectiveness of your cleaner, consider heating the vinegar before mixing. This helps combine the ingredients better.
Once mixed, don't forget to label the spray bottle for easy identification. Keep it within reach in your shower for convenient cleaning access.
With these essential ingredients, you're well on your way to creating a powerful, homemade shower cleaner!
Mixing Instructions Explained
Mixing your homemade shower cleaner is simple and quick. Start by gathering your essential ingredients: equal parts of distilled white vinegar and Dawn dish soap.
You'll also need a clean spray bottle for easy application. If you'd like, you can heat the vinegar in a microwave-safe container for about 30 seconds to help it mix better with the dish soap.
Next, carefully pour the heated vinegar into your spray bottle using a funnel to avoid spills. Once that's done, add the same amount of Dawn dish soap to the spray bottle. Make sure you've got the right proportions for an effective cleaner.
Now, secure the spray top on the bottle and gently swirl the mixture to combine the ingredients, being careful not to create excessive foam.
Once it's well mixed, label the bottle with the contents and the date. This'll help you keep track of when you made it.
Application Techniques for Best Results
To get the best results from your homemade shower cleaner, start by using a proper spray technique to cover all surfaces evenly.
Consider using an eco-friendly cleaning solution such as a vinegar soak or a baking soda paste to enhance the effectiveness of your cleaner.
After spraying, let the cleaner sit for at least five minutes to break down grime effectively.
This waiting period is essential for maximizing the cleaner's power before you scrub and rinse.
Proper Spray Technique
A clean shower starts with the right application technique for your homemade cleaner. To achieve the best results, follow these essential steps:
- Clear the Area: Remove all products and accessories from the shower. This guarantees you have unobstructed access to all surfaces.
- Generously Spray: Apply the cleaner generously on all surfaces, including walls, tub, and glass. Even coverage is key for maximum effectiveness.
- Focus on Buildup: Pay extra attention to areas with heavy soap scum or grime; these spots often need a little more product and scrubbing.
- Rinse Thoroughly: After scrubbing, rinse all areas with warm water. This step washes away the cleaner residue, preventing streaks and leaving surfaces shiny and clean.
Allow Time to Sit
Allowing your homemade shower cleaner to sit is crucial for achieving a deep clean. After you've sprayed the cleaner onto the surfaces, give it at least 5 to 30 minutes to work its magic. This waiting time allows the ingredients to break down soap scum and grime, enhancing the cleaner's effectiveness.
If you're dealing with stubborn stains or heavy buildup, consider letting it sit for up to an hour for even better results.
Before you apply the cleaner, make sure to clear the shower area of products and accessories. This guarantees that the cleaner can work undisturbed, penetrating and loosening dirt on every surface.
During this waiting period, you'll find that scrubbing becomes much easier, as the cleaner has already started breaking down the grime.
Once the time is up, rinse the surfaces thoroughly to remove any residue left by the cleaner. This step guarantees a clean and fresh environment for your shower.
Tips for Shower Maintenance

Keeping your shower clean doesn't have to be an intimidating task; with a few simple strategies, you can maintain its freshness effortlessly. Regular maintenance and the right cleaning supplies and tools will help you tackle grime with ease.
By incorporating daily maintenance techniques, you'll keep soap scum at bay and enjoy a sparkling clean shower.
Here are some tips to help you stay on top of your shower cleaning routine:
- Store your homemade shower cleaner within reach in the shower to encourage regular use.
- Spray the shower cleaner while you shower, allowing it to work on grime as you rinse off.
- Use a tile and grout scrub brush to tackle tough spots, especially in corners and crevices.
- Consider a magic eraser for quick touch-ups to eliminate minor soap scum and mildew easily.
Establish a weekly or bi-weekly deep cleaning schedule to complement your daily maintenance.
This guarantees that your shower remains in top condition, free of buildup and looking fresh.
Alternative Cleaning Recipes
If you're looking for effective and budget-friendly alternatives to commercial shower cleaners, homemade recipes can be a game-changer. Eco-friendly cleaning solutions not only tackle soap scum effectively but also promote a healthier living environment.
One popular DIY shower cleaner for tackling soap scum involves mixing 1 cup of Blue Dawn dish soap with 3 cups of white vinegar in a spray bottle. Spray it liberally on your shower surfaces and let it sit for 30 minutes to overnight before rinsing for a sparkling finish.
For a no-rinse daily shower cleaner, combine 1/2 cup of hydrogen peroxide, 1/2 cup of rubbing alcohol, 1 teaspoon of Blue Dawn, 1 tablespoon of Jet-Dry rinse aid, and 2 cups of distilled water in a large spray bottle. This cleaning solution acts as a preventative measure against soap scum buildup, leveraging the effectiveness of eco-friendly products in maintaining cleanliness.
If you're after a gentle cleaning solution safe for stone and marble, mix 1/4 cup of vinegar with 4 cups of warm water, adding optional essential oils for a pleasant scent.
These alternative recipes not only save you money but also provide effective solutions to keep your shower clean and fresh without harsh chemicals.
Safe Usage and Compatibility

When using homemade shower cleaners, you need to take into account the compatibility of your surfaces to avoid damage.
Always test a small area first, especially on new materials or sensitive surfaces like natural stone.
For effective cleaning, contemplate incorporating eco-friendly options that are safe for various bathroom materials.
Plus, remember to follow safety precautions to keep your cleaning experience safe and effective.
Surface Compatibility Considerations
Understanding surface compatibility is essential for safe and effective use of homemade shower cleaners. When using a vinegar-based cleaner, you need to be cautious, as vinegar's acidity can damage certain materials, particularly natural stone, marble, and granite.
Always remember to test your cleaner on an inconspicuous area before applying it broadly. This simple step can save you from potential damage.
Here are some key points to evaluate regarding surface compatibility:
- Safe for: Glass, glazed tile, and porcelain surfaces.
- Avoid on: Natural stone, marble, granite, and porous materials to prevent absorption and long-term damage.
- Caution needed for: New acrylic installations, as vinegar may cause cloudiness or degradation.
- Mixing cleaners: Avoid combining your homemade cleaner with other products to prevent harmful chemical reactions.
Safety Precautions During Use
Before you start cleaning, it's important to take some safety precautions to protect both yourself and your shower surfaces.
First, always test your homemade cleaners on a small, inconspicuous area to verify they're compatible, especially if your shower features natural stone or acrylic. Vinegar, while effective, can damage these materials.
Next, store your homemade cleaners in a sturdy plastic spray bottle. Avoid glass containers unless you're using hot vinegar, as weak bottles can break or leak in the shower.
Maintain proper ventilation while cleaning; this will help minimize the strong odor of vinegar and prevent respiratory irritation.
It's vital never to mix vinegar with bleach or ammonia, as this combination produces toxic gases that can harm your health.
Additionally, consider using non-slip mats in the shower or tub to prevent slips while cleaning, especially on wet surfaces.
Testing on New Materials
Testing homemade cleaners on new materials is essential to confirm safe usage and compatibility. Before applying your vinegar-based cleaners to large areas, always conduct a test on a small, inconspicuous spot. This step helps confirm that the cleaner won't damage the surface, especially when dealing with sensitive materials.
Here are some tips to keep in mind when testing on new materials:
- Choose a small area: Pick a hidden spot to avoid visible damage.
- Avoid vinegar on natural stone: Vinegar-based cleaners can etch marble and granite surfaces.
- Check manufacturer guidelines: Always refer to cleaning recommendations for specific materials.
- Dilute your solution: Start with a less concentrated mixture to see how the material reacts.
After testing, wait 24 hours to observe any delayed reactions like discoloration or surface damage.
User Experiences and Testimonials
Many users rave about their experiences with homemade shower cleaners, particularly those made with vinegar and Dawn dish soap. You've likely heard that these DIY cleaners effectively tackle soap scum and grime, often leaving your shower looking nearly new.
Many testimonials highlight how cost-effective these solutions are, with users expressing satisfaction over saving money compared to pricey commercial products. Additionally, using natural ingredients like baking soda and vinegar not only enhances cleaning power but also promotes a sustainable approach to household cleaning.
Feedback consistently points out that a no-rinse daily shower cleaner greatly reduces watermarks and prevents soap scum buildup, making it an ideal choice for busy households like yours. You'll appreciate the eco-friendly nature of this homemade cleaner, as it avoids harsh chemicals and minimizes your environmental impact.
Community support around these DIY cleaners is remarkable. Users share their variations and tips, creating a collaborative environment that enhances cleaning effectiveness.
You might find yourself experimenting with different ratios or adding essential oils for a pleasant scent, just like many others have. Overall, the positive user experiences emphasize not only the effectiveness of homemade solutions but also the satisfaction that comes from using eco-friendly alternatives that fit your budget and lifestyle.
Energy Efficiency Tips

Regularly implementing energy efficiency tips can greatly lower your utility bills and promote a more sustainable home.
Start by making small changes that can have a significant impact. Here are some effective strategies:
- Insulate your water heater: Using a water heater blanket can improve insulation and reduce energy costs by 10-20%.
- Install low-flow showerheads: These devices can decrease water usage by up to 40% without sacrificing pressure, helping you save both water and energy.
Keeping your fixtures clean contributes to their efficiency, similar to how daily cleaning habits help maintain kitchen sinks.
- Maintain your HVAC system: Regularly changing filters improves air quality and efficiency, cutting down on energy consumption for heating and cooling.
- Utilize natural light: During the day, open curtains and blinds to reduce the need for artificial lighting in your bathroom.
Additionally, don't forget the importance of regular cleaning.
By keeping your showerheads and faucets clean, you can prevent mineral buildup, ensuring they operate efficiently and helping to further reduce water usage.
Implement these energy efficiency tips today, and you'll notice both environmental benefits and savings on your bills!
Understanding Soap Scum and Hard Water
You mightn't realize it, but soap scum and hard water can quickly turn your shower into a cleaning nightmare. Soap scum is that slimy buildup you see, formed from soap residue mixed with minerals from hard water. In fact, about 85% of water in the U.S. is hard, packed with calcium and magnesium that lead to those pesky mineral deposits.
This hard water not only creates unsightly water spots but also makes cleaning surfaces a real challenge. Regularly disinfecting your shower surfaces is vital to maintain a hygienic environment and prevent the buildup of harmful bacteria and mold, which can thrive in moist areas.
When soap interacts with hard water, it fails to lather properly, resulting in more soap scum. Over time, this buildup can foster the growth of mold and mildew, complicating your cleaning efforts and leaving you with stubborn stains and unpleasant odors.
Properly disinfecting your bathtub is essential to avoid these issues. Regular cleaning is crucial to combat these issues. By using effective homemade solutions, you can prevent soap scum and hard water stains, keeping your shower looking fresh and clean.
Conclusion
Making your own shower cleaner not only saves you money but also cuts down on harmful chemicals in your home. Did you know that nearly 80% of commercial cleaners contain toxic substances? By using simple, natural ingredients, you can achieve a sparkling clean shower while keeping your family safe. With regular maintenance and the right application techniques, you'll enjoy a fresh, inviting space. So grab those ingredients and start your journey to a cleaner, healthier shower today!