To clean your walk-in tiled shower like a pro, start by mixing equal parts of white vinegar and warm water in a spray bottle. Clear the area and apply the solution, letting it sit for 10-15 minutes. Scrub the grout with a baking soda paste, rinse thoroughly, and dry with a microfiber cloth. Use a squeegee after each shower to minimize water buildup. Follow these steps, and you'll discover more tips for keeping your shower spotless.
Importance of Cleaning a Walk-In Tiled Shower
Cleaning your walk-in tiled shower isn't just about keeping it looking nice; it's essential for your health and safety.
Regular cleaning prevents the buildup of soap scum, mold, and mildew, which thrive in damp environments and can harm your hygiene. A clean shower reduces the risk of bacteria, which can lead to skin irritations and infections. Additionally, using natural cleaning agents like vinegar and baking soda helps to effectively eliminate these harmful substances. Regular use of DIY non-toxic solutions not only cleans but also promotes a sustainable living environment.
You'll also notice that maintaining your shower enhances its aesthetic appeal, keeping those tiles and grout bright and fresh. Consistent maintenance contributes to a more enjoyable shower experience by eliminating unpleasant odors and ensuring a safe, slip-free surface. Additionally, regular disinfection helps prevent harmful bacteria buildup in your shower environment, promoting a healthier space.
Investing time in regular cleaning not only prolongs the life of your tiled surfaces but also makes future cleaning efforts easier.
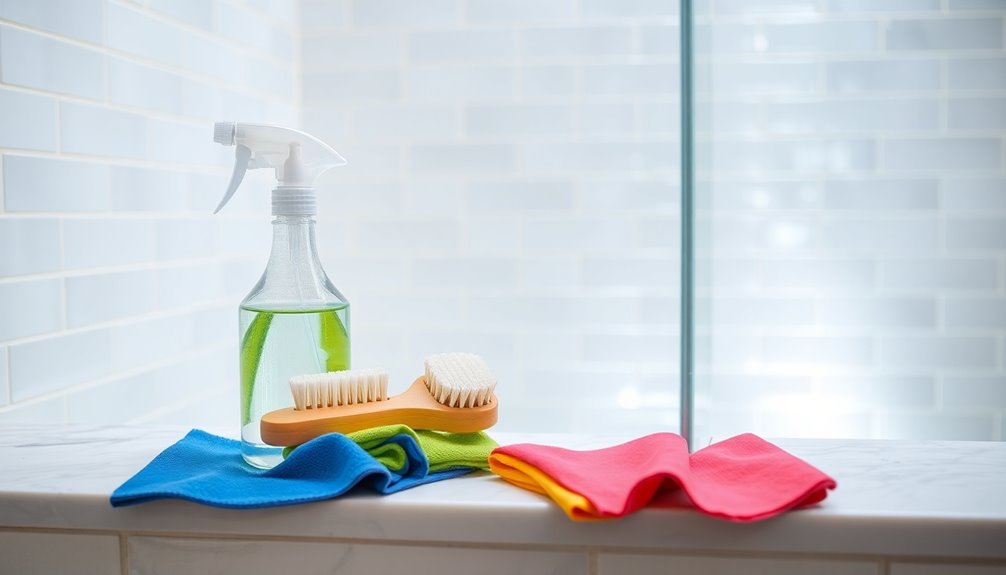
Materials Needed for Cleaning a Walk-In Tiled Shower
To effectively clean your walk-in tiled shower, you'll need a few essential materials.
Grab white vinegar and baking soda for tackling mineral deposits and grime, along with liquid dish soap for that extra shine. Regularly using natural remedies can significantly reduce soap scum buildup, making cleaning easier over time. Using organic products ensures that your cleaning routine is safe for both your health and the environment.
A spray bottle and a soft-bristled brush or sponge will help you apply your cleaning solutions evenly and safely. Additionally, consider using natural disinfectant options like distilled white vinegar to ensure a safe and effective cleaning routine.
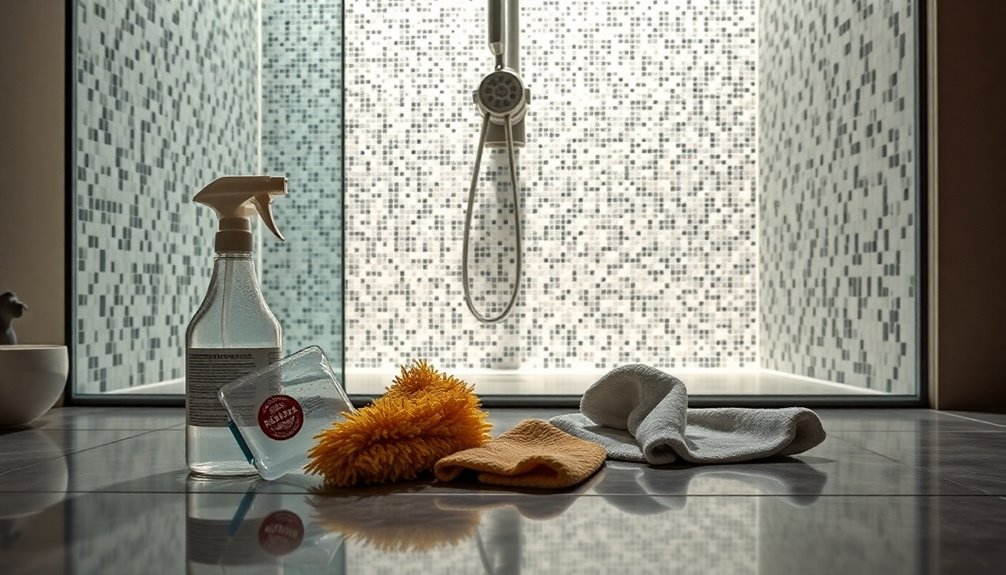
Essential Cleaning Supplies
A few essential cleaning supplies can make a big difference when tackling a walk-in tiled shower.
Start with white vinegar to dissolve mineral deposits and eliminate soap scum. Baking soda acts as a mild abrasive, scrubbing away grime and neutralizing odors. Liquid dish soap is great for breaking down grease on tiles, and a spray bottle helps you apply your cleaning solutions easily.
You'll need a scrub brush or an old toothbrush to tackle tough stains without scratching the tiles. For thorough cleaning, consider steam cleaners for effective sanitation.
Finally, don't forget grout sealer to maintain grout integrity. Keeping these supplies organized and accessible will streamline your cleaning process and encourage regular maintenance.
Effective Cleaning Solutions
While maintaining a walk-in tiled shower might seem intimidating, having the right cleaning solutions at your fingertips can make the task much easier.
Start with white vinegar, which effectively dissolves mineral deposits, and baking soda, a mild abrasive that scrubs away grime and neutralizes odors. Combine these with liquid dish soap to tackle soap scum and grease.
Use a spray bottle for easy application, ensuring even coverage on tiles and grout lines. For scrubbing, grab a soft-bristled brush or sponge to remove tough stains without scratching the surface.
If you encounter particularly stubborn stains, consider specialized products like limescale removers or grout sealers for deep cleaning and maintaining your shower's appearance.
Step-by-Step Guide to Clean a Walk-In Tiled Shower
Cleaning your walk-in tiled shower doesn't have to be an intimidating task. Follow these simple steps for a sparkling clean space:
1. Prepare your cleaning solution****: Mix equal parts white vinegar and warm water. Make a baking soda paste for stubborn stains. Proper tools are essential for effective cleaning, and using natural cleaning methods can enhance your cleaning routine.
2. Clear the area: Remove all personal care items and quickly rinse the tiles to eliminate loose debris.
3. Apply the cleaning solution: Spray the vinegar solution generously on the tiles and let it sit for 10-15 minutes to break down soap scum. This will help maintain a clean and hygienic bathing environment, as employing regular disinfection practices can minimize the buildup of grime.
Then, scrub with a soft-bristled brush.
4. Tackle the grout: Apply baking soda paste, let it sit, then scrub with a grout brush.
Rinse all surfaces thoroughly with clean water and dry with a microfiber cloth.
Expert Tips for Cleaning a Walk-In Tiled Shower
To keep your walk-in tiled shower looking its best, establish a regular maintenance schedule to prevent buildup. Regular cleaning is important to avoid foodborne illnesses that can thrive in damp environments. Use safe cleaning solutions, like a vinegar and water mix, to tackle tough stains without damaging your tiles, especially on ceramic tiles where products like Aunt Fannies Vinegar Cleaner can be particularly effective. Don't forget about effective grout care—it's key to maintaining both hygiene and appearance. Additionally, consider using EPA-certified disinfectants to ensure a thorough clean and eliminate harmful pathogens.
Regular Maintenance Schedule
Establishing a regular maintenance schedule is key to keeping your walk-in tiled shower looking pristine.
Here's how to create an effective cleaning routine:
- Daily: Use a shower spray made from vinegar and water to break down soap scum and hard water stains.
- After Each Shower: Grab a squeegee and wipe down tiles and glass surfaces to reduce moisture and prevent mold growth.
- Weekly: Perform a quick clean with a vinegar solution to keep surfaces fresh and minimize grime accumulation.
- Monthly: Schedule a deep clean to tackle soap scum and mildew.
Don't forget to reseal grout lines annually to protect against moisture penetration.
Following this schedule will help maintain your shower's integrity and beauty.
Safe Cleaning Solutions
Using safe cleaning solutions is essential for maintaining the beauty and longevity of your walk-in tiled shower. A mixture of equal parts white vinegar and water effectively dissolves soap scum and mineral deposits on tiled surfaces.
For tougher stains, create a paste using equal parts baking soda and water, letting it sit for at least 30 minutes before scrubbing. If you encounter stubborn grout stains, mix two parts hydrogen peroxide with one part water, spray it on the grout, and allow it to sit before scrubbing.
Avoid harsh chemicals like chlorine bleach, as they can damage your shower over time. Regular cleaning with these natural solutions helps prevent moisture penetration, mold, and mildew growth, ensuring your shower remains pristine.
Effective Grout Care
While keeping your walk-in tiled shower looking fresh, effective grout care is essential to prevent stains and moisture damage. Here are some expert tips to help you maintain your grout:
- Baking Soda Paste: Mix baking soda and water to create a paste. Apply it to the grout and scrub with an old toothbrush for best stain removal.
- Vinegar Solution: Regularly treat grout lines with a vinegar-water solution. Let it sit for 10-15 minutes before scrubbing to dissolve soap scum.
- Sealing Grout: Seal your grout annually with a product like Impregnator 511 to protect against moisture and staining.
- Stubborn Stains: For tough stains, mix two parts hydrogen peroxide with one part water, apply, and scrub after 10-15 minutes.
Using mild cleaners protects your tiles and grout integrity!
Ineffective Tips for Cleaning a Walk-In Tiled Shower
Many homeowners make the mistake of relying on harsh chemicals for cleaning their walk-in tiled showers, thinking it will yield better results. These cleaning agents can damage both tiles and grout over time, leading to costly repairs. Using abrasive cleaners or tools like steel wool might seem effective, but they scratch tiles, increasing grime buildup. Ignoring regular cleaning practices allows stubborn stains and soap scum to accumulate, making future deep cleans more difficult. Overusing products can leave residue, attracting more dirt and creating a cycle of grime. Additionally, relying solely on hot water can set stains and damage grout; lukewarm water is a safer option. Always verify proper ventilation while cleaning to avoid lingering odors and moisture. Incorporating eco-friendly alternatives in your cleaning routine can help maintain your shower without causing damage. Utilizing natural ingredients not only enhances cleaning effectiveness but also ensures a healthier home environment. Furthermore, using baking soda as a gentle abrasive can help effectively tackle tough stains without harming your tiles.
Tips for Maintaining a Clean Shower (and Preventing Tiresome Scrubbing)
To keep your walk-in tiled shower clean and reduce the need for intense scrubbing, it's essential to adopt a few simple habits. Here are some effective tips:
- Use liquid body wash instead of bar soap to prevent soap scum buildup on tiles and grout.
- Spray a vinegar-water solution on tiles a couple of times a week to eliminate grime before it accumulates.
- Squeegee after each shower to remove excess water, which minimizes water spots and mold growth.
- Seal grout lines annually to protect against moisture penetration, ensuring they stay clean and intact.
Additionally, consider steam cleaning occasionally for a deeper clean.
A combination of baking soda and vinegar can also help freshen up stubborn spots during your household cleaning routine.
Conclusion
Cleaning your walk-in tiled shower doesn't have to feel like a chore. With the right materials and techniques, you'll find that keeping it sparkling is easier than you thought. Coincidentally, the more often you clean, the less buildup you'll have, making each session quicker and simpler. So, grab those supplies and plunge in—before you know it, you'll be enjoying a fresh, gleaming shower that feels like a spa retreat every time you step in!